

I can't express how much I love this jacket! It's one of the very few DIY's I'm actually proud of. They usually end up half completed and sad stuffed in the back of my closet or simply tossed into my garbage can. This one is actually really simple to do and you can create your own embellished jean jacket in a few hours. It only took me 3 project runway episodes. The hardest part is finding the items to embellish your jacket with - don't worry - I have done this part for you. Details below.

The very first thing you will need is a jean jacket. This is super easy. You probably already have one in your closet that you rarely wear or if you're like me (and you actually do wear yours a lot) you can grab a new one to embellish. I purchased mine from Target. I think it was like $24.99.
Step by Step Tips (Read me BEFORE you touch that iron)
- Lay out all of your patches/buttons/pins unto the jacket as you want them to end up. Take pictures. Trust me on this. You will forget what goes where in your perfect formation. This took me the longest. I was super picky about where everything would end up. But this is also the fun part.
- I removed everything by section and kept them in piles that way. Right collar, right pocket, etc.. This simplified the application process for me.
- Apply your patches. This is so tricky y'all. Make sure you read the instructions for each patch. Some will require that you use wet heat and some need it to be totally dry. Super confusing if you're not paying attention. It works best if you do all the dry patches first and then apply the ones that need damp heat. If an area is wet and you try to apply a dry patch it will not adhere and basically destroy it. If you make this mistake - you can always hand stitch the patch (a pain) but I had to do that with one I messed up on.
- Anything that you need to sew on - do this now. I only had to sew on one patch that I messed up by trying to use the wrong ironing method. I also had to sew on the tassels at the bottom of my crown. That took about 20 minutes to make sure they were on there really well. I am NOT a seamstress. I just weaved in and out of the silver hooked and then sewed a straight line across the bottom. All by hand.
- Last step is to arrange your bottoms and pins. I really had to refer to the pictures I took to get this correct. I also ended up sewing on some buttons to the jacket as well.

Here is the shopping breakdown starting with the front of my jacket:

#1 - This custom gorgeous Lilly Pulitzer Mickey Head is from Lillain and Lloyd. They even embroider your initials into the patch making it one of a kind. This was my favorite patch - hands down - I just loved everything about it - which is why I made sure to place it front and center. They also shipped it to me super fast with very clear application instructions and the quality was impressive. The little hashtag was part of a packet from H&M. And the tinkerbell pin is from GoPinPro (more about that amazing shop in just a minute).

#2 - Now I can tell you more about GoPinPro - whom I LOVE. They sent me a bag of random, gorgeous Disney pins. The kind you can trade all over the Disney Parks. Pins like that purchased inside the parks are super pricey. But you can get a trading pin lot of 25 pins for only $24.99. Thats a $1 a pin. They cost SO much more and these are totally tradable. This means when you go into the parks you and your children can swap these pins with any Disney cast member for a pin you like better. It's really fun! All of the pins that didn't make it onto my jacket - we traded inside the park. This is the best way to go and a really fun activity for the whole family. My kids love it! The Mickey pin and Ariel pin were both in my lot.
The rainbow heart patch is from Target - part of a pack I found in the little girl's department. Yay! I finally got to purchase something from the girl section of target! The Happy pin is from Walmart. The teacup patch is from Little Missy Clothing.
#3 - These Minnie Patches are from Hobby Lobby
#5 - Rainbow pin is from Walmart. Robin Hood and Minnie Tinkerbell pins are from GoPinPro. Fox patch is from Target pack. The Teapot patch is from Little Missy Clothing.

#6 - The adorable dole whip button is from My Sweetest Nerdy Dreams. She has an incredible selection of super cute buttons for Disney. I really don't know how you would choose a favorite. They are all so fun! I have several awesome buttons from this shop on my jacket. All of the pins are from GoPinPro - see why you need to order a lot for your jacket?!?

#7 - Another adorable button - I don't think a Disney jacket could be complete without the castle. The castle button is from My Sweetest Nerdy Dreams. The little glitter Minnie and Mickey's are actually buttons from a pack at Walmart. I sewed them onto the jacket. All of the pins are from GoPinPro except the pineapple which is from Walmart.
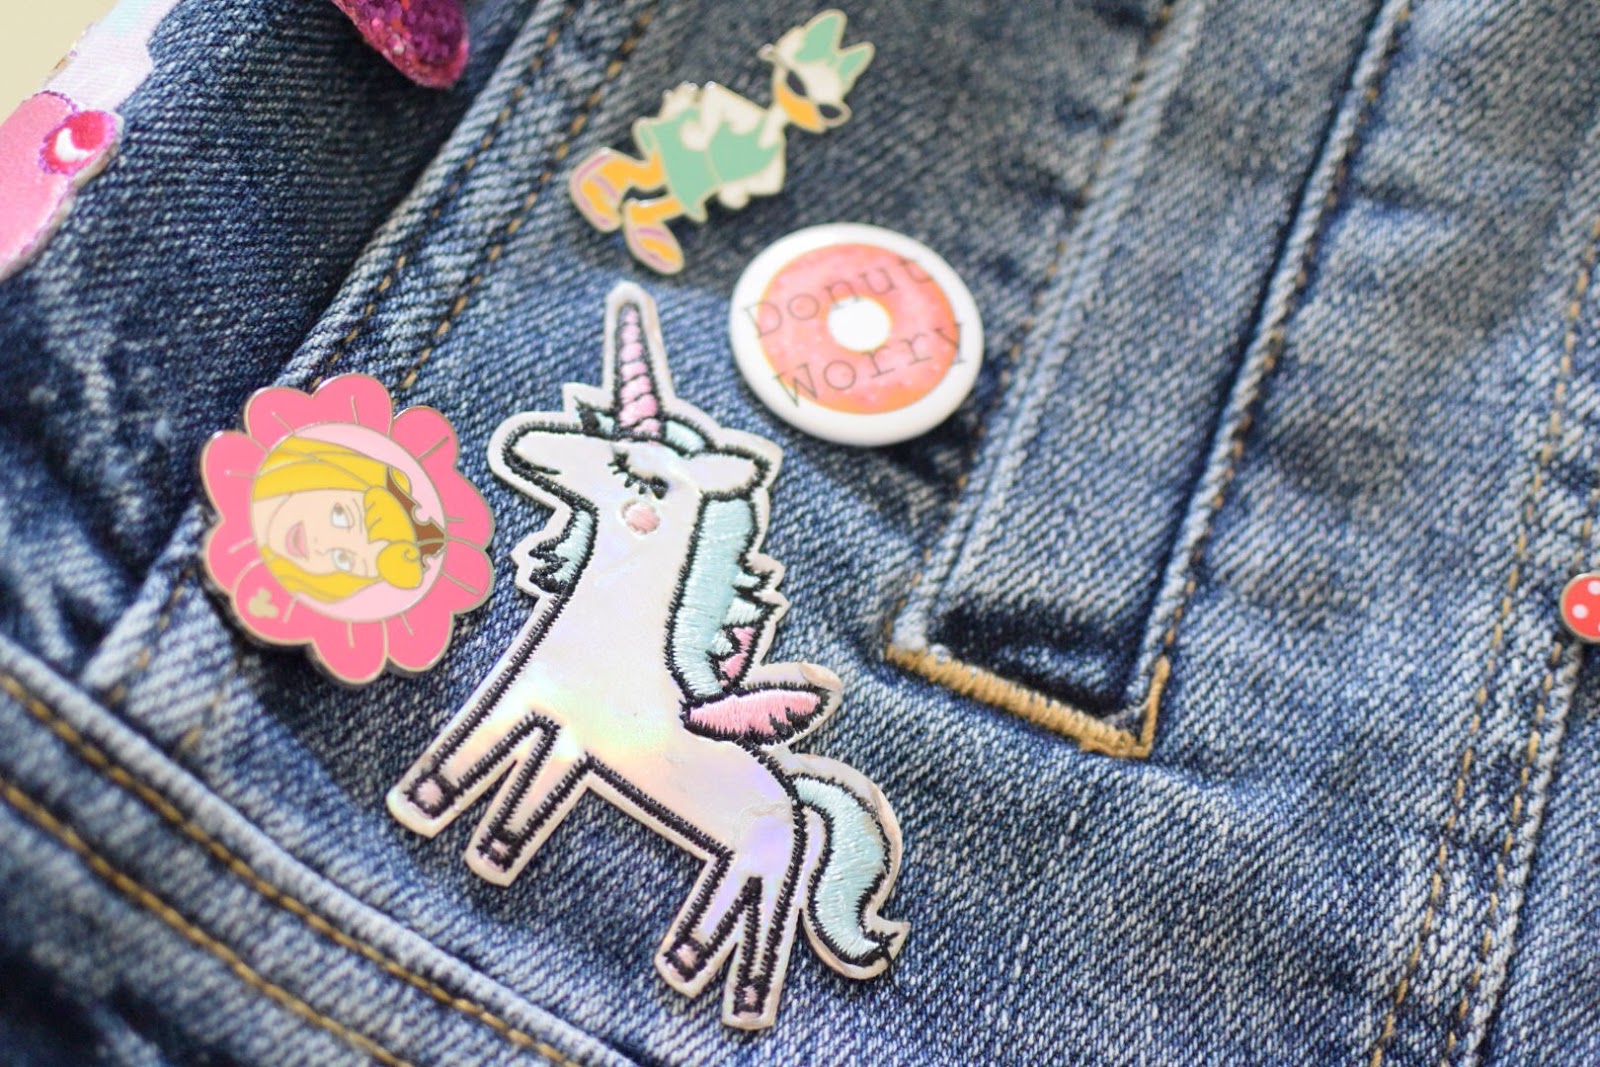
#8 - The unicorn patch is from the pack from H&M. The Donut worry button is from Walmart and the Sleeping Beauty & Daisy pins are from GoPinPro.


#1 - The crown and snow white pin are from GoPinPro. The Snow White Button is from My Sweetest Nerdy Dreams. The Yas Queen and the queen are both from the H&M pack - it actually said Snap Queen but I'm not on snapchat so I removed the snap from the top of the patch.

#2 - I just loved how the Be Awesome patch fit perfectly into the square on the back top of my jacket. That patch is from the Target pack and the Tinkerbell pin is from GoPinPro.
#3 - This patch is from the H&M Pack and the Goofy pin is from GoPinPro.
#4 - Both patches are from the H&M Pack and all of the pins are from GoPinPro.
#5 - The letters to spell out Disney Squad are all from Walmart. The hashtag is from Hobby Lobby.

#6 - The Daisy button is from Sweetest Nerdy Dreams. The cat pin is from GoPinPro. The cupcake patch is from Hobby Lobby. The sparkling heart pin is from Walmart and the Bambi patch is from Little Missy Clothing.

#7 - I purchased the crown patch from Hobby Lobby and then I had bought the packets of tassels from Target. When I bought them I was clueless what I would use them for - I was just attracted to the colors and well - I love tassels. I was really excited to see them work so well for my jacket!

#8 - The kiss blowing Minnie pin is from GoPinPro and also the cheshire cat mickey pin. The Alice patch is from Little Missy Clothing. The popsicle patch is from the H&M package.
#9 - All of these great pins are from GoPinPro.

#10 - The Minnie Mouse Button is from Sweetest Nerdy Dreams. The Minnie Lane pin and Mickey Mouse pin are from GoPinPro. And the pink sequin patch is from Hobby Lobby.
Have I inspired you to create your own embellished jacket? This is a DIY that anyone with an iron can do. Even if Disney isn't your thing you can make any time of embellished jacket. They are so on trend right now. My sons are begging me to make jackets for them too. What was your favorite pin, button, or patch?
Please take a minute to visit the amazing shops that made this Disney jacket possible and show them some love!
Lillian & Lloyd - Gorgeous custom embroidered patches
GoPinPro - All the pins your need for both your jacket and trading within the parks
My Sweetest Nerdy Dreams - A Disney button for everyone + buttons for all the other things you love too!

*I was provided a complimentary pins, buttons, and patches from Lillian & Lloyd, GoPinPro, and My Sweetest Nerdy Dreams in exchange for my honest opinions and feedback. The words above are all my own and my true thoughts. *
No comments: